Only  $9.9! Get 50,000 minutes with our Starter Plan, perfect for your MVP project.
Only $9.9! Get 50,000 minutes with our Starter Plan, perfect for your MVP project.
Grab It Now 
Beauty AR
Overview
  • Web
    • Quick Start
    • Integration
      • Overview
      • Built-in Camera
      • Custom Stream
      • Loading Optimization
      • Configuring Effects
      • Configuring Segmentation
      • Configuring Animojis and Virtual Avatars
    • API Document
    • Release Notes
    • Best Practices
      • Publishing over WebRTC
      • Publishing over WebRTC (Preinitialization)
      • Publishing Using TRTC
    • FAQs
  • Android
    • Integration
      • Integrating SDK
      • Integrating TEBeautyKit
    • API Document
    • Release Notes
    • Best Practices
      • Reducing SDK Size
      • Effect Parameters
    • Advanced Capabilities
      • Gesture Recognition
      • Face Recognition
      • Virtual Background
    • Material Production
      • Beauty AR Studio Introduction
    • FAQs
  • IOS
    • Integration
      • Integrating SDK
      • Integrating TEBeautyKit
    • API Document
    • Release Notes
    • Best Practices
      • Reducing SDK Size
      • Effect Parameters
    • Advanced Capabilities
      • Gesture Recognition
      • Face Recognition
      • Virtual Background
    • Material Production
      • Beauty AR Studio Introduction
    • FAQs
  • Flutter
    • Integration
    • API Document
    • Material Production
      • Beauty AR Studio Introduction
  • Overview
    • Overview
  • Activate the Service
  • Pricing
  • Free Trial
    • Web
    • Mobile
Beauty AR

Integration

Step 1. Download and integrate the Beauty AR SDK

1. Download the native Android SDK and iOS SDK.
2. Add the resource files to your own project:
Android
iOS
1. Open build.gradle in app and add the Maven address for your package. For example:
dependencies {
implementation 'com.tencent.mediacloud:TencentEffect_S1-07:latest.release'
}
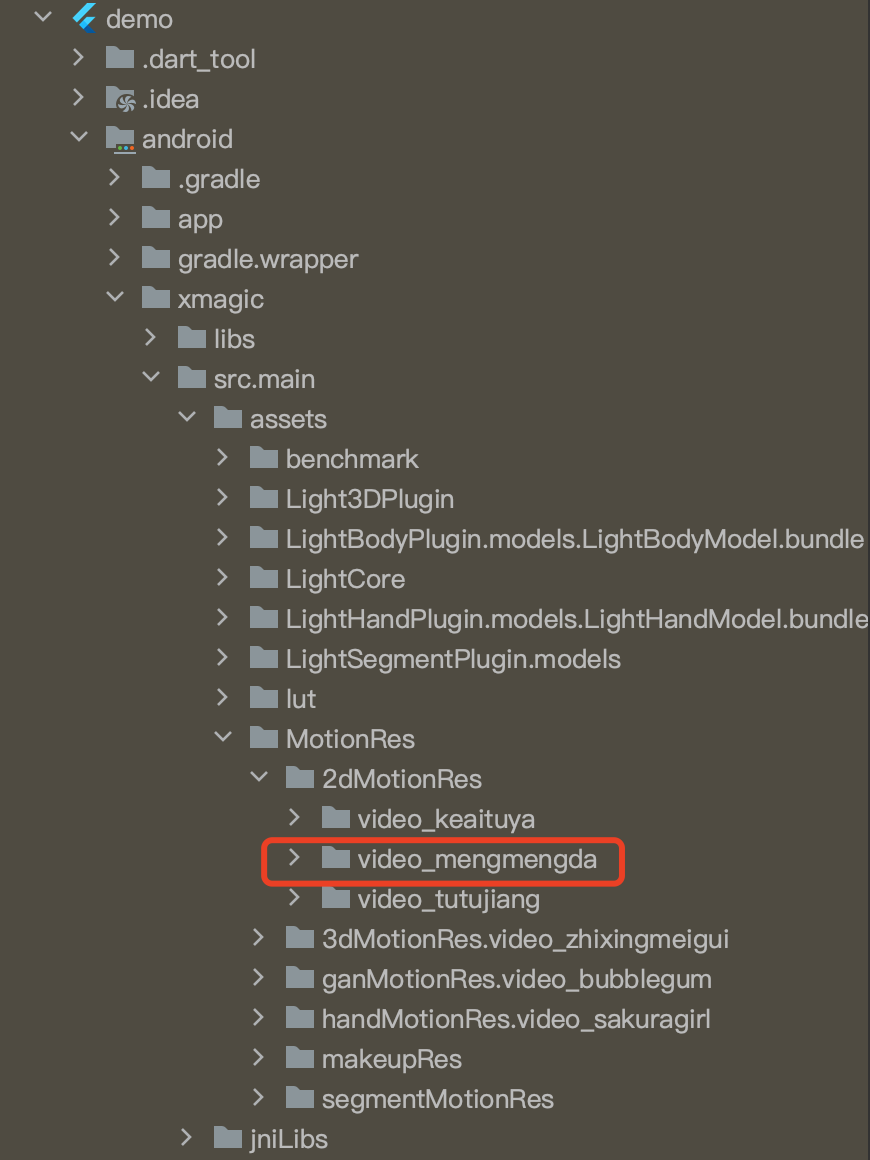
2. Find the src/main/assets folder in app (if there isn't this folder, create one). Check if there is a MotionRes folder. Copy it to ../src/main/assets.
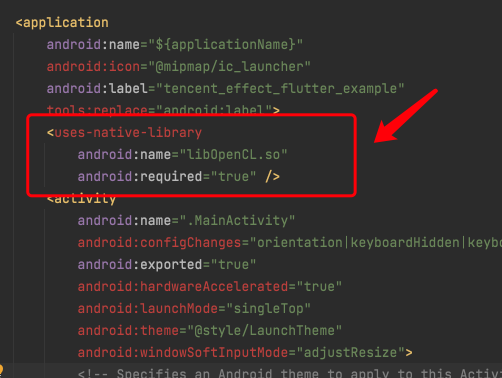
3. Open AndroidManifest.xml in app and add the following tag to application.
<uses-native-library
android:name="libOpenCL.so"
android:required="true" />
// `true` here indicates that the application would not run properly without the library. The system does not allow installing the application on a device without the library.
//`false` indicates that the application can use the library if it is available, but can also run without it. It can be installed on a system without the library. If you set the parameter to `false`, you need to deal with the issues that may arise due to the absence of the library.
// Description at the Android website: %!s(<nil>)
It will look like this:


4. Obfuscation configuration.
If you enable optimization (by setting minifyEnabled to true) when building your application, some code that is not called at the Java layer will be removed. However, such code may be called at the native layer, causing a no xxx method error.
To fix the issue, add the following keep rules to prevent the code from being removed:
-keep class com.tencent.xmagic.** { *;}
-keep class org.light.** { *;}
-keep class org.libpag.** { *;}
-keep class org.extra.** { *;}
-keep class com.gyailib.**{ *;}
-keep class com.tencent.cloud.iai.lib.** { *;}
-keep class com.tencent.beacon.** { *;}
-keep class com.tencent.qimei.** { *;}
-keep class androidx.exifinterface.** { *;}
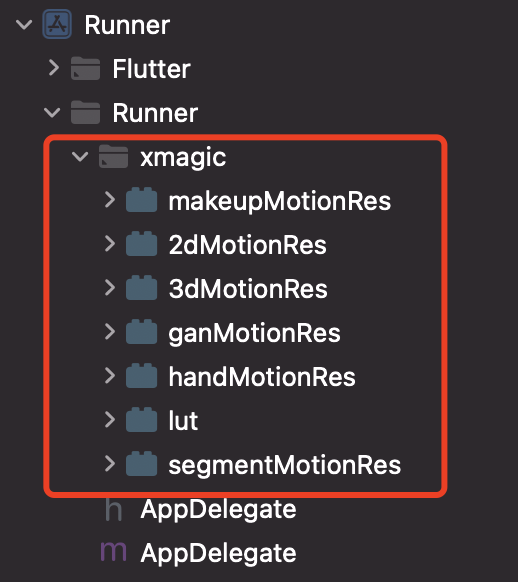
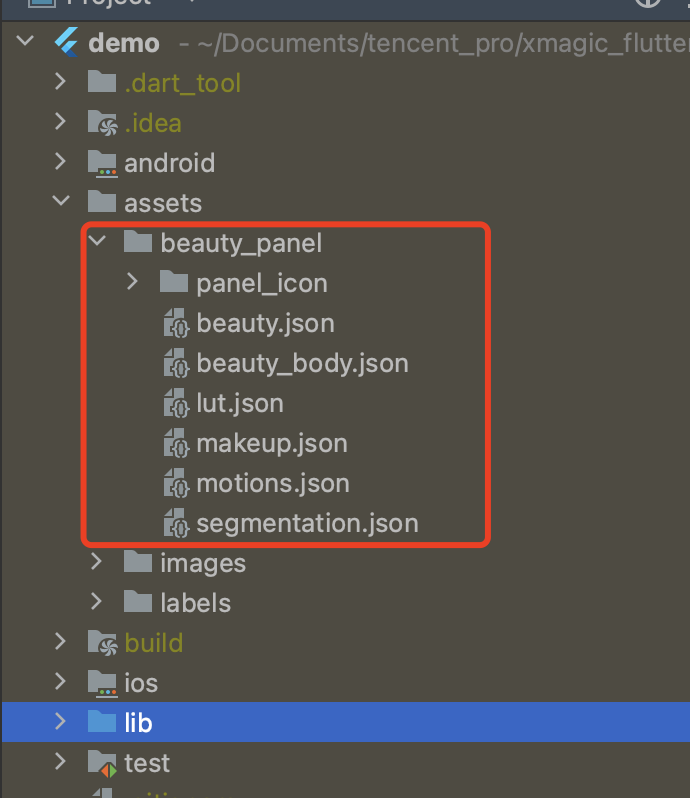
1. Add effect resources to your project (your resources may differ from those in the screenshot):


2. Copy the four classes in demo/lib/producerBeautyDataManager, BeautyPropertyProducer, BeautyPropertyProducerAndroid, and BeautyPropertyProducerIOS – to your Flutter project. They are used to configure effect resources and display effect options in the effect panel.

Step 2. Reference the Flutter SDK

Reference from GitHub: Add the following reference in the pubspec.yaml file of your project:
tencent_effect_flutter:
git:
url: https://github.com/Tencent-RTC/TencentEffect_flutter
Reference locally: Download the latest edition of the Beauty AR Flutter SDK. Copy the android ios, and lib folders and the pubspec.yaml and tencent_effect_flutter.iml files to your project directory, and add the following code in the pubspec.yaml file of your project.
tencent_effect_flutter:
path: ../
tencent_effect_flutter only serves as a bridge. It is Xmagic that implements effects. The latest edition of Xmagic is used by default.
You can use the following methods to update your SDK:
Android
iOS
Execute flutter pub upgrade in your project directory or click Pub upgrade in the top right of the subspec.yaml page.
Execute flutter pub upgrade in your project directory and then run pod update in the ios directory.

Step 3. Bind TRTC and Beauty

Android
iOS
Add the following code to oncreate of the application class (or onCreate of FlutterActivity):
TRTCCloudPlugin.register(new XmagicProcesserFactory());
Add the following code to didFinishLaunchingWithOptions of the AppDelegate class:
XmagicProcesserFactory *instance = [[XmagicProcesserFactory alloc] init];
[TencentTRTCCloud registerWithCustomBeautyProcesserFactory:instance];
It will look like this:


Step 4. Call the resource initialization API

V0.3.5.0:

void _initSettings(InitXmagicCallBack callBack) async { _setResourcePath(); /// Copying the resource only needs to be done once. Once it has been successfully copied in the current version, there is no need to copy it again in future versions. if (await isCopiedRes()) { callBack.call(true); return; } else { _copyRes(callBack); } } void _setResourcePath() async { String resourceDir = await ResPathManager.getResManager().getResPath(); TXLog.printlog( '$TAG method is _initResource ,xmagic resource dir is $resourceDir'); TencentEffectApi.getApi()?.setResourcePath(resourceDir); } void _copyRes(InitXmagicCallBack callBack) { _showDialog(context); TencentEffectApi.getApi()?.initXmagic((result) { if (result) { saveResCopied(); } _dismissDialog(context); callBack.call(result); if (!result) { Fluttertoast.showToast(msg: "initialization failed"); } }); }

V0.3.1.1 and earlier:

String dir = await BeautyDataManager.getInstance().getResDir();
TXLog.printlog('File path: $dir');
TencentEffectApi.getApi()?.initXmagic(dir,(reslut) {
_isInitResource = reslut;
callBack.call(reslut);
if (!reslut) {
Fluttertoast.showToast(msg: "Failed to initialize the resources");
}
});

Step 5. Set the license

TencentEffectApi.getApi()?.setLicense(licenseKey, licenseUrl,
(errorCode, msg) {
TXLog.printlog("Print the authentication result errorCode = $errorCode msg = $msg");
if (errorCode == 0) {
// Authentication succeeded
}
});

Step 6. Enable effects

/// Enable effects
var enableCustomVideo = await trtcCloud.enableCustomVideoProcess(open);

Step 7. Set effect properties

V0.3.5.0:

TencentEffectApi.getApi()?.setEffect(sdkParam.effectName!, sdkParam.effectValue, sdkParam.resourcePath, sdkParam.extraInfo)

V0.3.1.1 and earlier:

TencentEffectApi.getApi()?.updateProperty(_xmagicProperty!);
/// You can call `BeautyDataManager.getInstance().getAllPannelData()` to get all the properties and call `updateProperty` to set properties.

Step 8. Set other properties

Pause the audio of an effect
TencentEffectApi.getApi()?.onPause();
Resume the audio of an effect
TencentEffectApi.getApi()?.onResume();
Listen for effect events
TencentEffectApi.getApi()
?.setOnCreateXmagicApiErrorListener((errorMsg, code) {
TXLog.printlog("Error creating an effect object errorMsg = $errorMsg , code = $code");
}); ///You need to set the listener before creating an effect object
Configure the callback of face, gesture, and body detection results
TencentEffectApi.getApi()?.setAIDataListener(XmagicAIDataListenerImp());
Configure the callback for animated effect hints
TencentEffectApi.getApi()?.setTipsListener(XmagicTipsListenerImp());
Configure the callback of facial keypoints and other data (only available in S1-05 and S1-06)
TencentEffectApi.getApi()?.setYTDataListener((data) {
TXLog.printlog("setYTDataListener $data");
});
Remove all callbacks. You need to remove all callbacks when terminating the page:
TencentEffectApi.getApi()?.setOnCreateXmagicApiErrorListener(null);
TencentEffectApi.getApi()?.setAIDataListener(null);
TencentEffectApi.getApi()?.setYTDataListener(null);
TencentEffectApi.getApi()?.setTipsListener(null);
Note:
For more information on the APIs, see the API documentation. For others, refer to the demo project.

Step 9. Add data to and remove data from the effect panel

Add effect resources:

Add your resource file to the corresponding folder as described in step 1. For example, to add a 2D animated effect, do the following:
1. Put the resources in the android/xmagic/src.mian/assets/MotionRes/2dMotionRes directory of the project:


2. Also add the resource to ios/Runner/xmagic/2dMotionRes.bundle.


beauty panel config:

V0.3.5.0

The properties on the beauty panel are configured through JSON files. The location of the JSON files is as shown below.


V0.3.1.1 and earlier

You can customize effect panel data in the BeautyDataManager, BeautyPropertyProducer, BeautyPropertyProducerAndroid, and BeautyPropertyProducerIOS classes.

Delete effect resources:

Your license may not support some beautification or body retouch effects, which you can delete from the panel. For example, to delete lipstick effects, delete the code below from getBeautyData of BeautyPropertyProducerAndroid and BeautyPropertyProducerIOS.