TIMPush plugin brings VoIP call notification mechanisms to the Google Platform, utilizing the data messages provided by Firebase Cloud Messaging (FCM) and the TUICallKit component, it can implement an incoming call display interface with a custom layout.
Note:
FCM Data Message Capability only supports TIMPush 7.9.5668 and later versions on Pixel phones;
TUICallKit only supports versions 2.3 and above.
This article provides a detailed introduction on how to integrate the TIMPush plugin into the TUICallKit component, utilize FCM's data messages capabilities, and achieve banner incoming call views for audio and video calls.
Integration effect
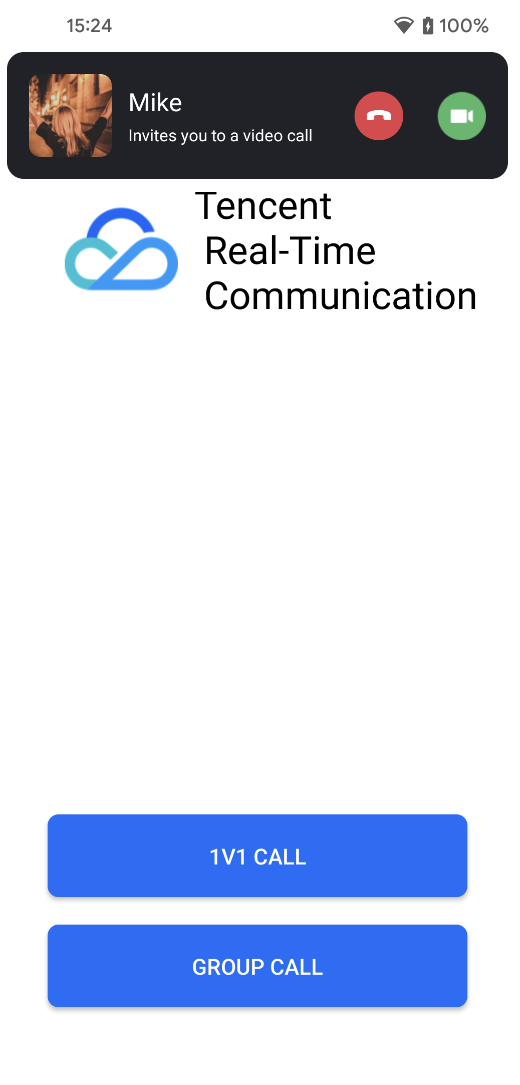
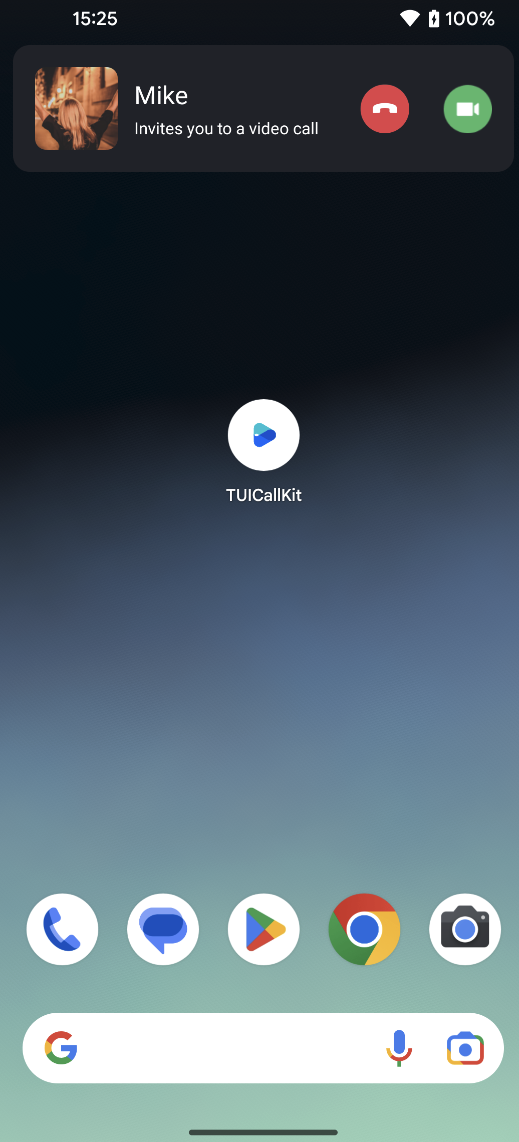
TUICallKit has successfully integrated FCM data messages on the GitHub sample project. You can quickly implement the feature's normal operation by referring to the Call UIKit sample project. The following diagram shows the incoming call views after receiving an call invitation when the application is in the foreground, background, or when the application process does not exist:
The display view when the application is in the foreground
The display view when the application is in the background or offline
Note:
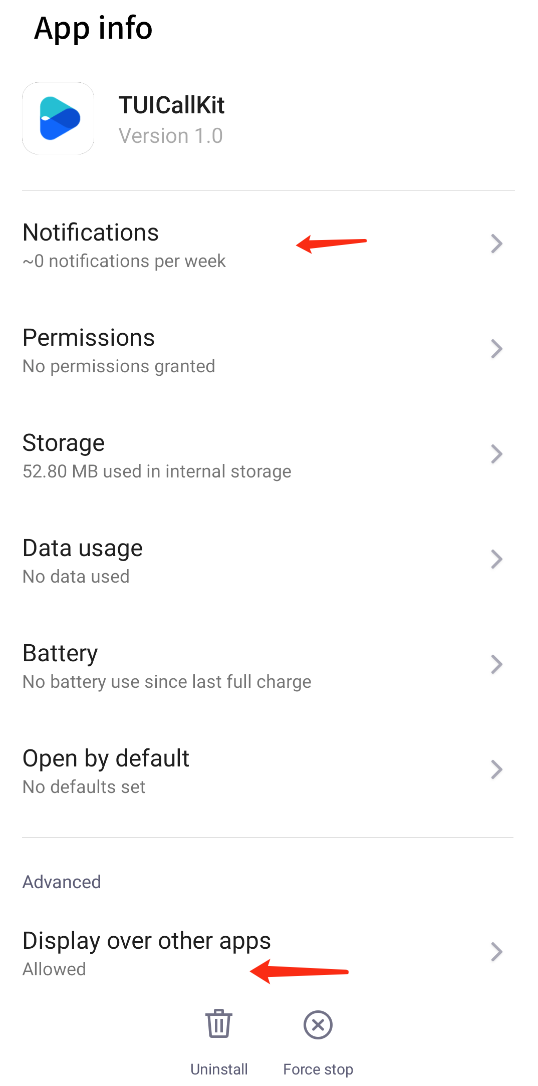
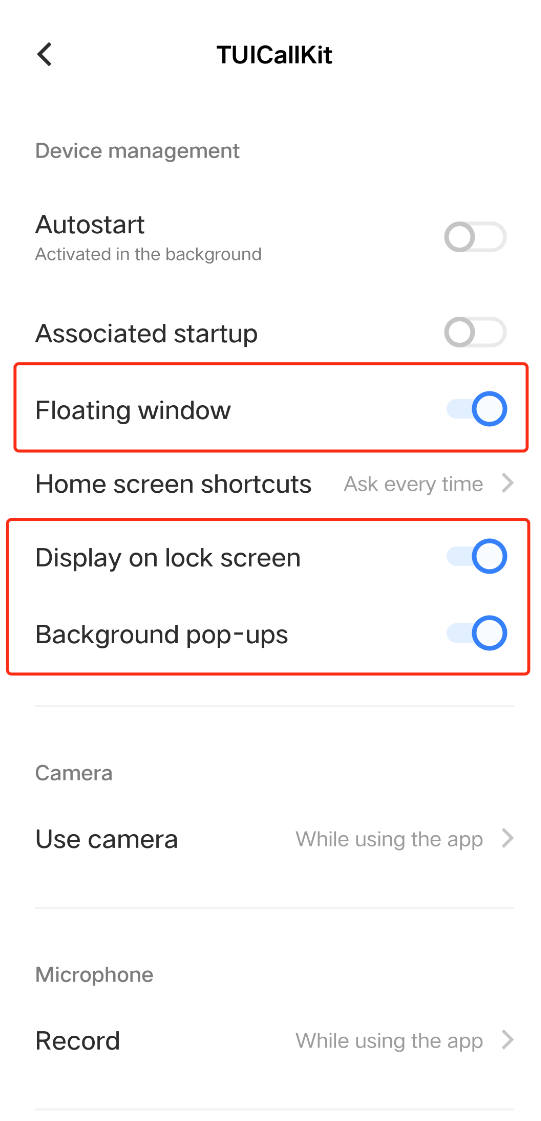
To achieve a good call experience as shown above, it is recommended to enable "notification" permissions, "Display over other apps" and "Background pop-ups" permissions in your application. For detailed methods, see: Relevant permissions enabled.
Preparation Requirements
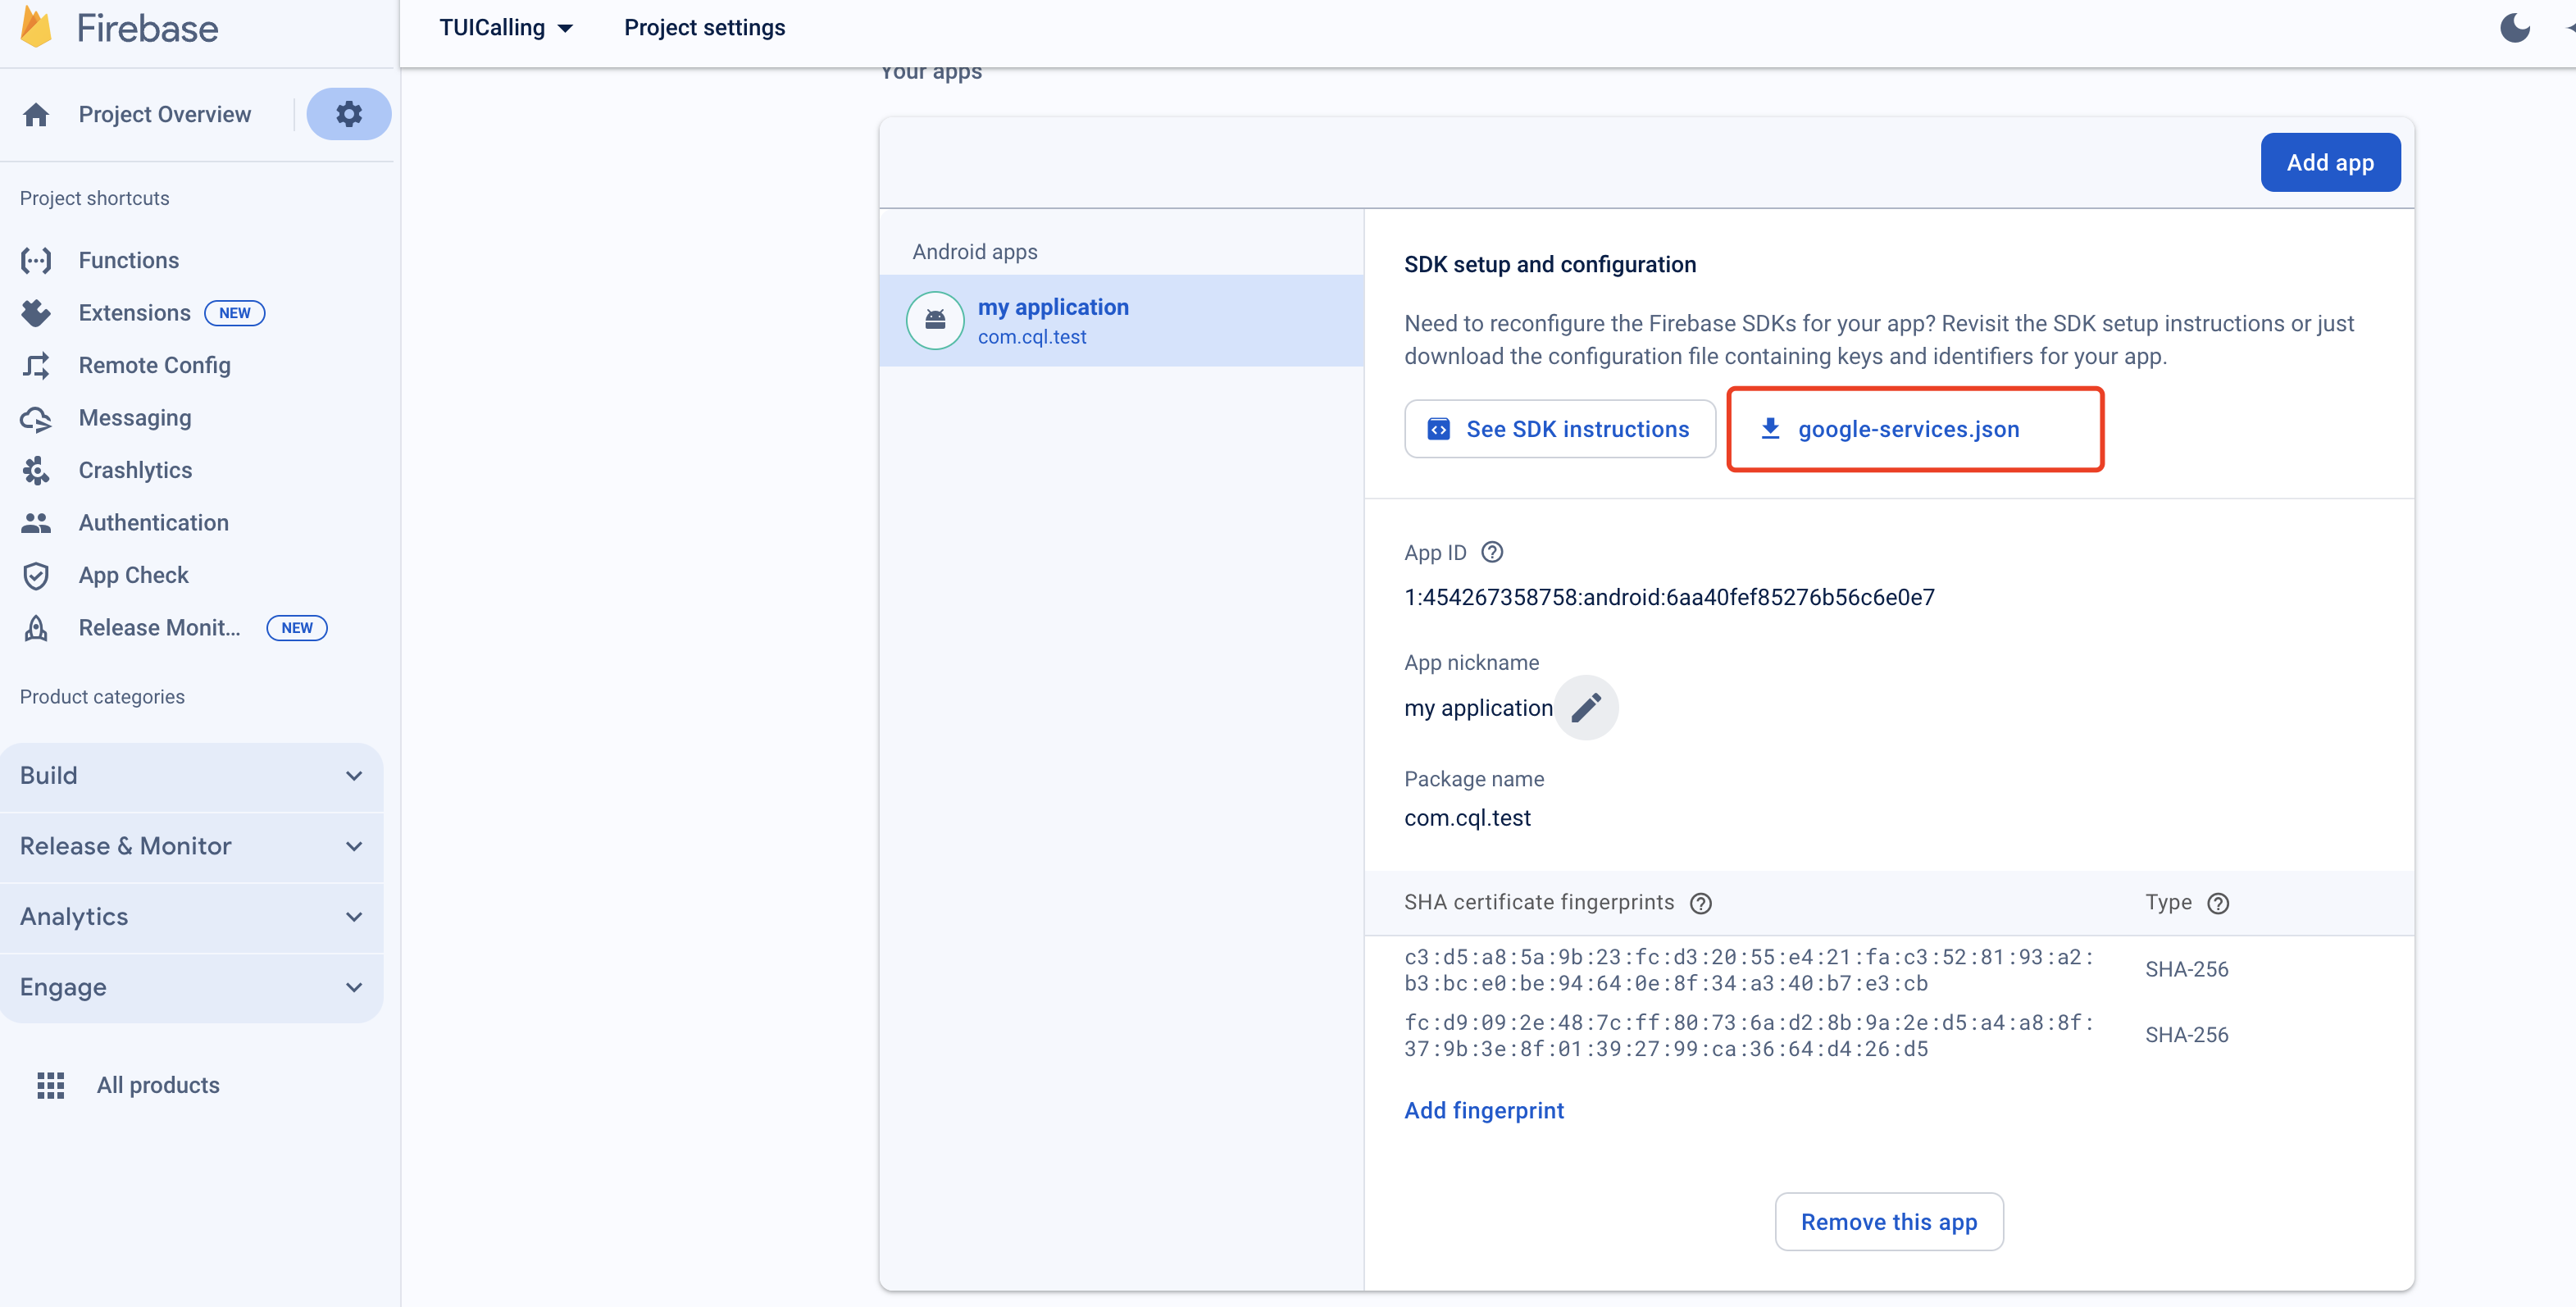
1. Register your application to the FCM Push Platform to obtain parameters such as AppID and AppKey, as well as the google-services.json file, in order to implement the offline push feature.
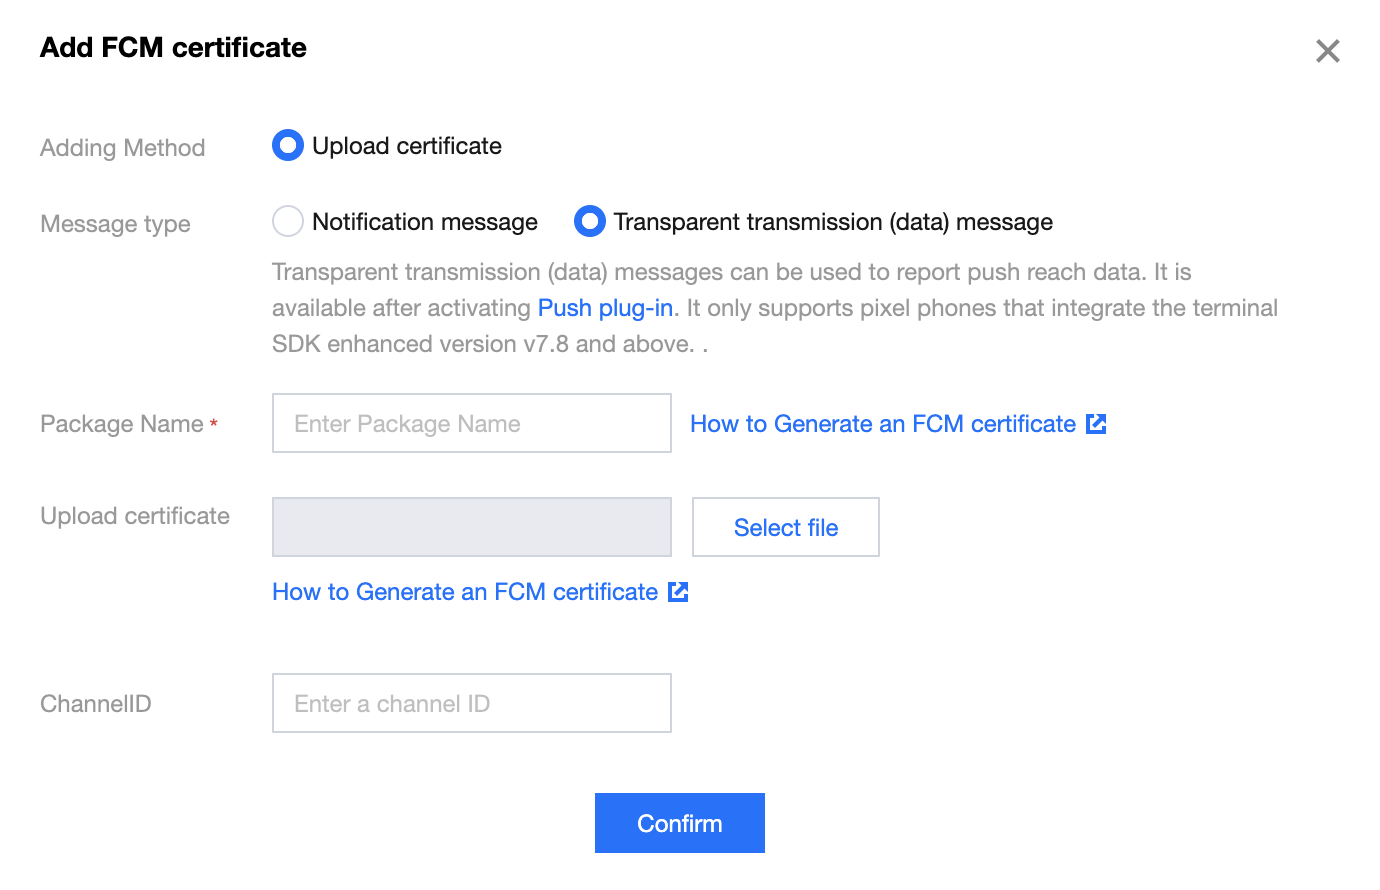
2. log in to the Instant Messaging IM Console, go to Push Management > Access Settings feature tab, select FCM, add FCM's certificate, and select Transparent transmission(data) message.
FCM Platform
Configuring in the IM console
Quick Integration
1. Download and add the configuration file
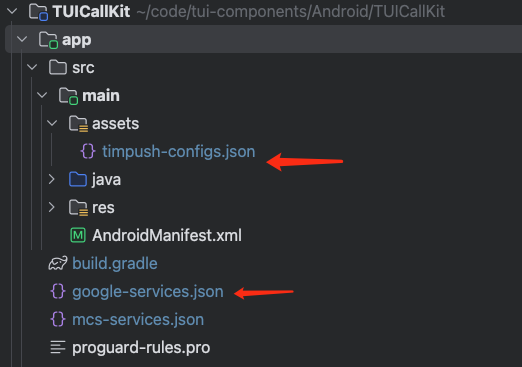
After completing the push information in the console, downloaded timpush-configs.json file and add to the file to the assets directory of the application module, and add the google-services.json to the project app directory.
Download the file timpush-configs.json
Download the file google-services.json
Add to the project
2. Integrate the TIMPush plugin
In the build.gradle file under the project's app directory, add the following dependency:
TIMPush requires integration with IM SDK in version 7.9.5668 and above.
You can modify the version of the IM SDK in the tuicallkit-kt/build.gradle file.
api "com.tencent.imsdk:imsdk-plus:7.9.5668"
3. Complete project configuration
In the project-level build.gradle file, under buildscript -> dependencies, add the following configuration:
buildscript {
dependencies {
classpath 'com.google.gms:google-services:4.3.15'
}
}
In the build.gradle file under the project's app directory, add the following configuration:
apply plugin: 'com.google.gms.google-services'
In the proguard-rules.pro file, add TIMPush related classes to the non-aliasing list:
-keep class com.tencent.qcloud.**{*;}
-keep class com.tencent.timpush.**{*;}
In the app directory of the project, find and open the build.gradle file, and change the application package name to your actual application package name.
applicationId 'com.****.callkit'
4. Comlete automatic login
In your application class, listener to the TIMPush event and implement automatic login method by your self.
TUICore.registerEvent(TUIConstants.TIMPush.EVENT_IM_LOGIN_AFTER_APP_WAKEUP_KEY,TUIConstants.TIMPush.EVENT_IM_LOGIN_AFTER_APP_WAKEUP_SUB_KEY,newITUINotification(){@OverridepublicvoidonNotifyEvent(String key,String subKey,Map<String, Object> param){if(TUIConstants.TIMPush.EVENT_IM_LOGIN_AFTER_APP_WAKEUP_KEY.equals(key)&&TUIConstants.TIMPush.EVENT_IM_LOGIN_AFTER_APP_WAKEUP_SUB_KEY.equals(subKey)){//you need to login again to launch call activity, please implement this method by yourselfautoLogin();}}});
After completing the above steps, you can use the offline push capability in TUICallKit.
Advanced features
Custom Ringtone
If you wish to customize the ringtone, you can replace the tuicallkit-kt/src/main/res/raw/phone_ringing.mp3 file.
Note:
After replacing the ringtone, no matter if the application is in the frontend, background, or offline, the ringtone will be the one that has been replaced.
After replacement, the ringtone received by other manufacturer's mobile phones upon invitation will also be the replaced one.
FAQs
1. Unable to pop up the incoming call UI after the application is killed
Confirm receipt of push. If push cannot be received, refer to the first step in the above document Quick Integration to see if the certificates have been added correctly to the IM cosole.
Make sure the console has selected FCM Transparent transmission(data) message, in accordance with the second step of the above Preparation Requirements.
Confirm receipt of data messages, filter logs (keyword: TIMPush), and check the following logs for printing (if messages are not received.
Confirm implementation of automatic login. It is only after automatic login that call requests are pulled and the incoming call UI is displayed.
2. Relevant permissions enabled
To ensure a good calling experience, it is recommended to enable "notification" permissions, "Display over other apps(Floating window)" and "Background pop-ups" permissions in your application. The specific methods are as follows:
After the application is installed, you can long-press the application Icon, select "Application Information", then enable "notification" permission, "Display over other applications," and "Background pop-ups" permissions. Alternatively, you can go to Mobile Phone > System Settings > Application Management > Application to manually enable these permissions.
Pixel 4a
VIVO
Suggestions and Feedback
If you have any suggestions or feedback, please contact info_rtc@tencent.com.